

Finally – bread!
And not just any bread. Bread made only using flour, salt and water. Bread that will wow your family and your friends and sustain your bellies very nicely. Now, I want to say up front that there is definitely a learning curve involved here. I, too, have had many flops (so many that I actually gave up!) before getting this to work for me. But…if you have patience and stay dedicated, I promise you can create delicious rustic sourdough at home.
First – my story:
Most of you know, I went to culinary school for pastries and bread back in 2008. After graduating, I went on to work at a bakery (oh those early – and I mean EARLY – morning shifts!) for a time before blogging took wing and I made this my business from home. During that time, though, I didn’t really make sourdough like this. At school and in the bakery, we used fresh yeast for all baked goods so that’s what I have experience with. It wasn’t until 2010 when my parents gave me the Tartine Bread book for Christmas did I become interested in sourdough. And by “interested”, I mean I read the book cover to cover and dedicated myself for about a month to creating my own rustic bread at home. Guess what? It flopped every.darn.time. Eventually, I got very frustrated (and busy with other recipe projects!) so I gave up, shelved my Tartine book and moved on. Looking back, I now know exactly what I was doing wrong, which was keeping my starter and leaven in the fridge and not doing a long enough rise. Keeping your dough in the fridge works for many but it didn’t work for me.

Oh, and by the way?
That’s rule number one here: what I say and what works for me might very well not work for you.
I’m sorry for that frustrating news! I am going to tell you guys exactly what I do and what works very well for me. I encourage you to try it but then tweak it and make it your own. All ovens are different and since we’re working with wild yeast here, a lot also depends on the temperature of your kitchen.
So back to my story. We moved to Berkeley this past winter and my first friend here just happened to be an incredible bread baker. She used the Tartine method and the first time we went over to their house for dinner, she totally wowed me with this INCREDIBLE loaf of cranberry walnut bread warm from the oven. I begged her for her secrets and she happily gave me a little bit of her starter (along with her wonderful typed out directions and photos!). So, with starter in hand, I got to work. This was at the very beginning of May. It’s now just about August and I’ve been baking bread every other day since!
My family goes through a TON of bread. We eat toast with salted butter and fragrant, runny honey every morning for breakfast and what’s dinner without rustic sourdough on the side? Ah, bread. I love you so much. Baking has become a lifestyle for me and – dare I say without sounding overly cheesy – reawakened the passion for baking that originally drew me to attend culinary school almost ten years ago. Once you try this bread, you will never be happy with any other grocery store packaged
bread again forever. Truth.
Okay, you’re all probably like okay jenna, enough with the sappy stuff – let’s get to the point.
So here we go.
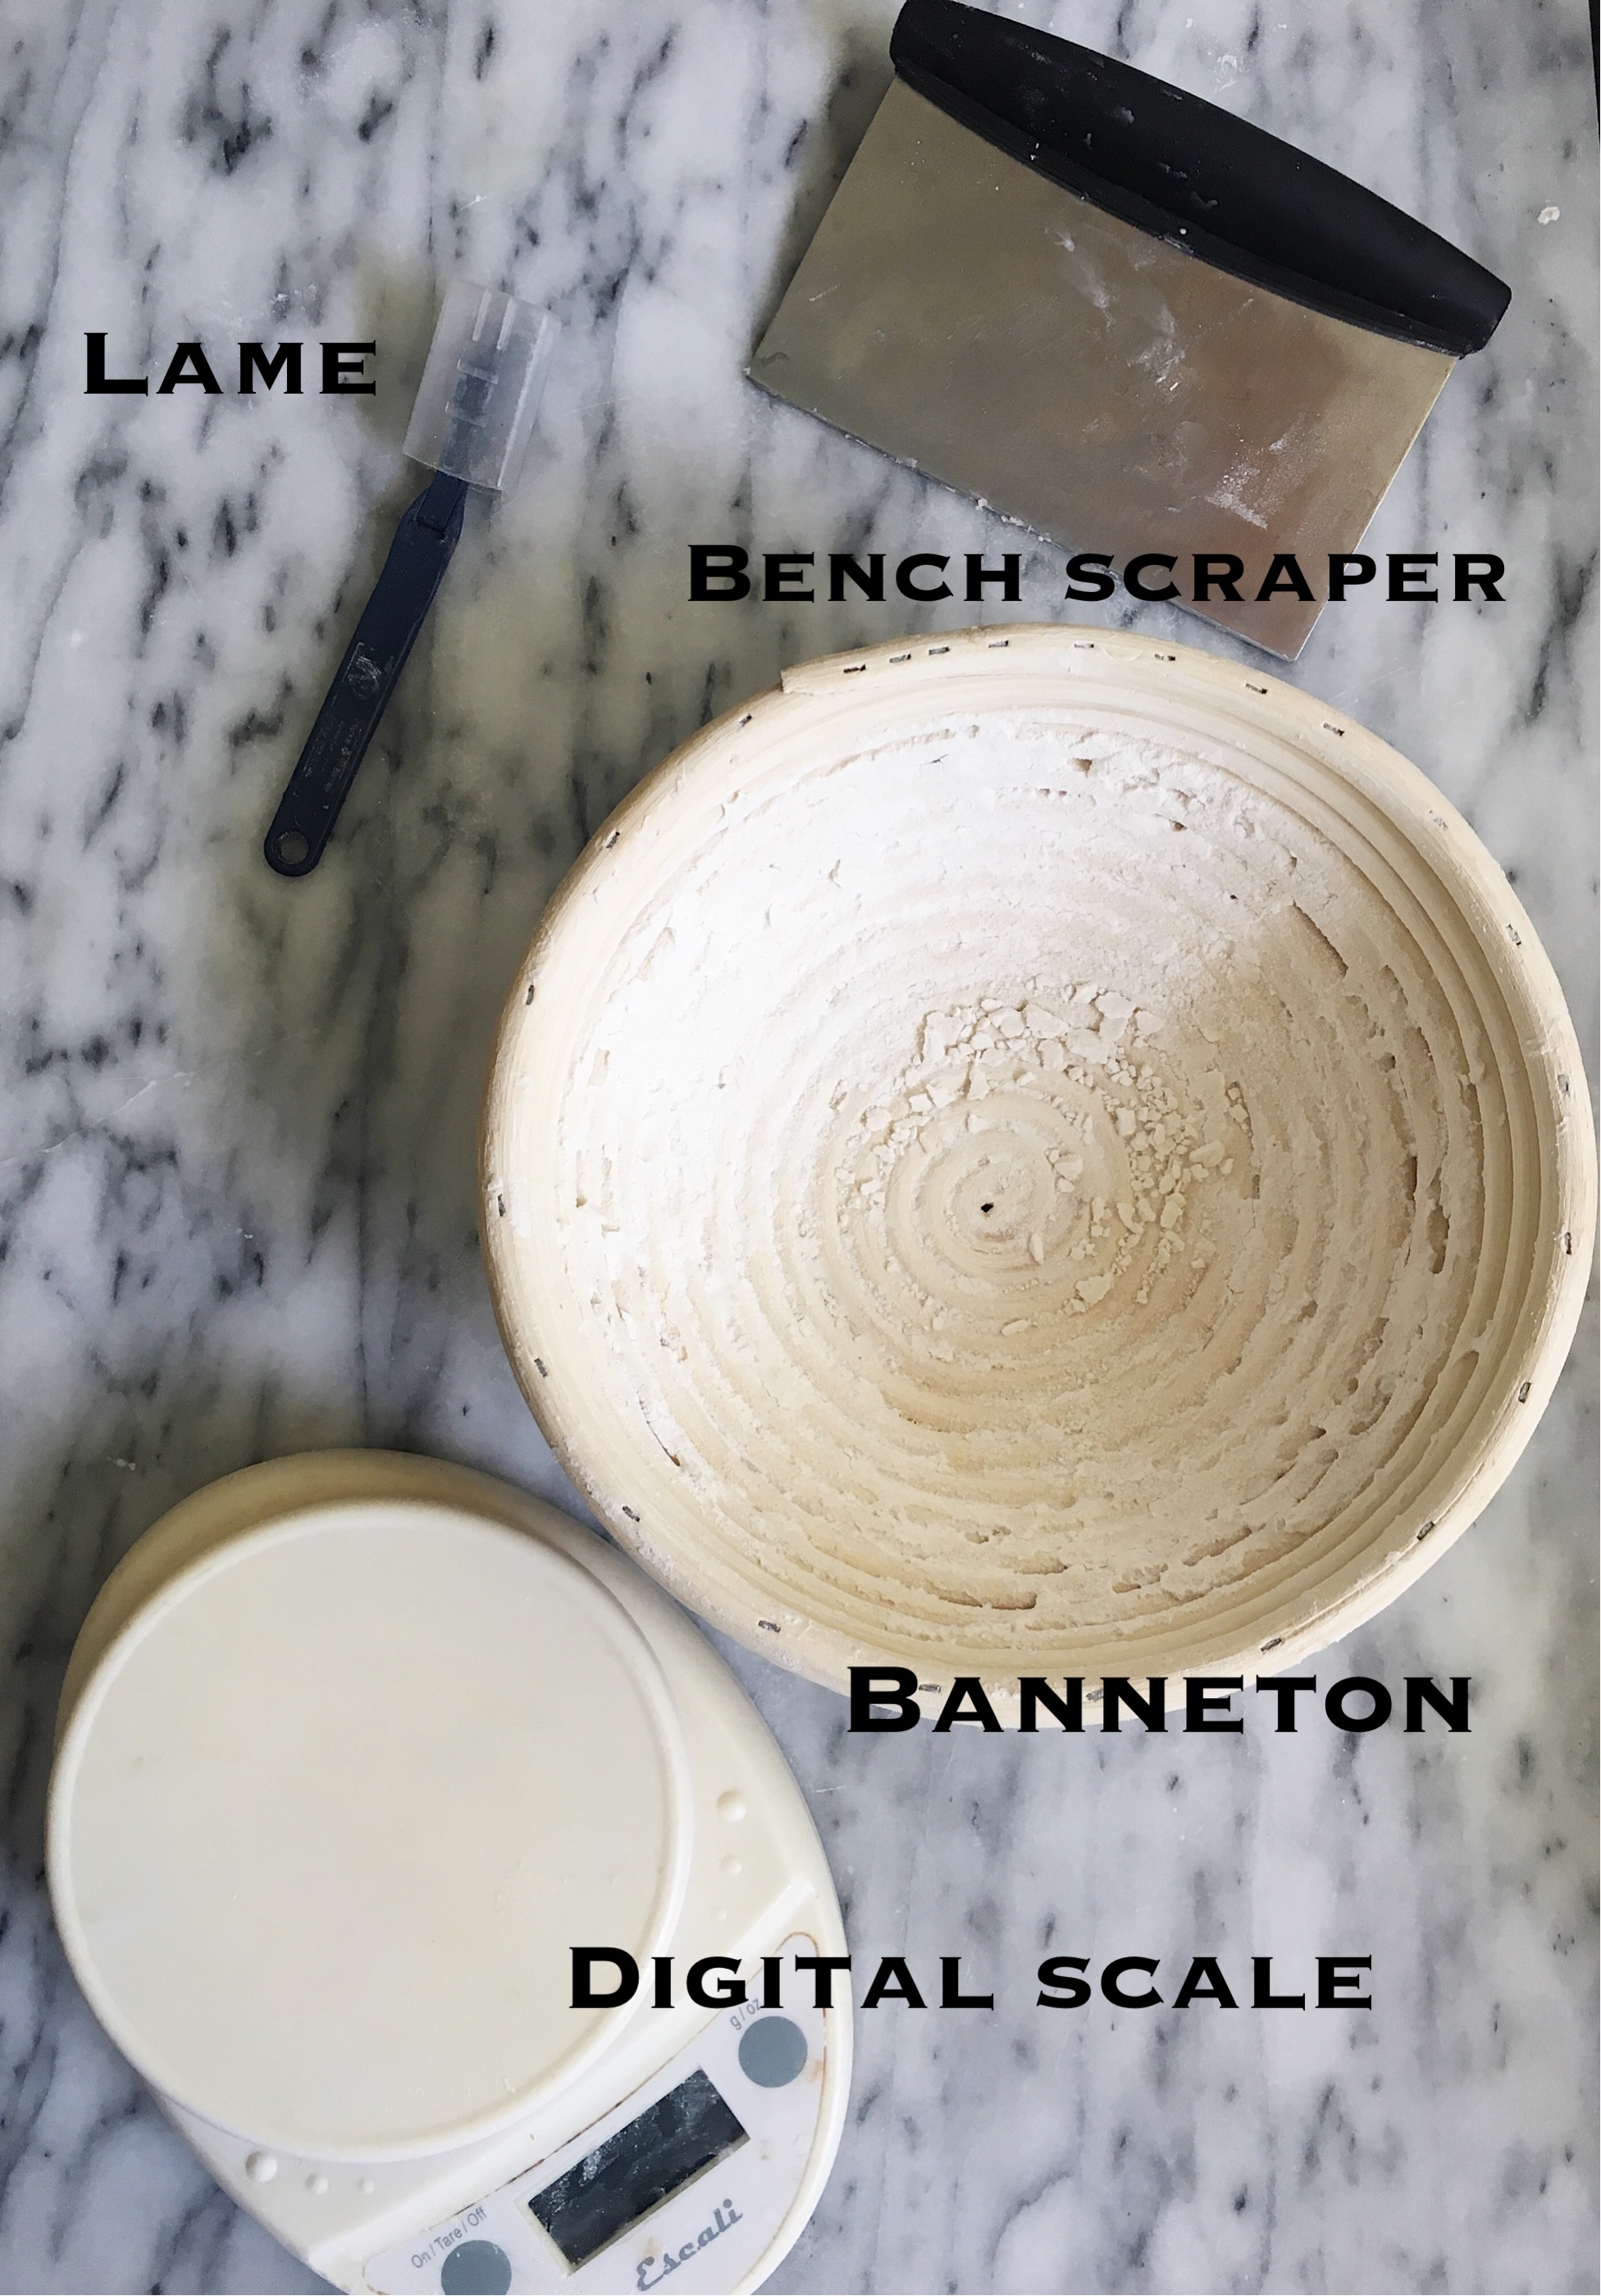
My “method” is based on the Tartine Bread method but varies a little bit. I’ve just tweaked things here or there and found what works best for us and I urge you to do the same. First of all, here are the tools I recommend for the project:
So you want to make bread? First — make your starter.
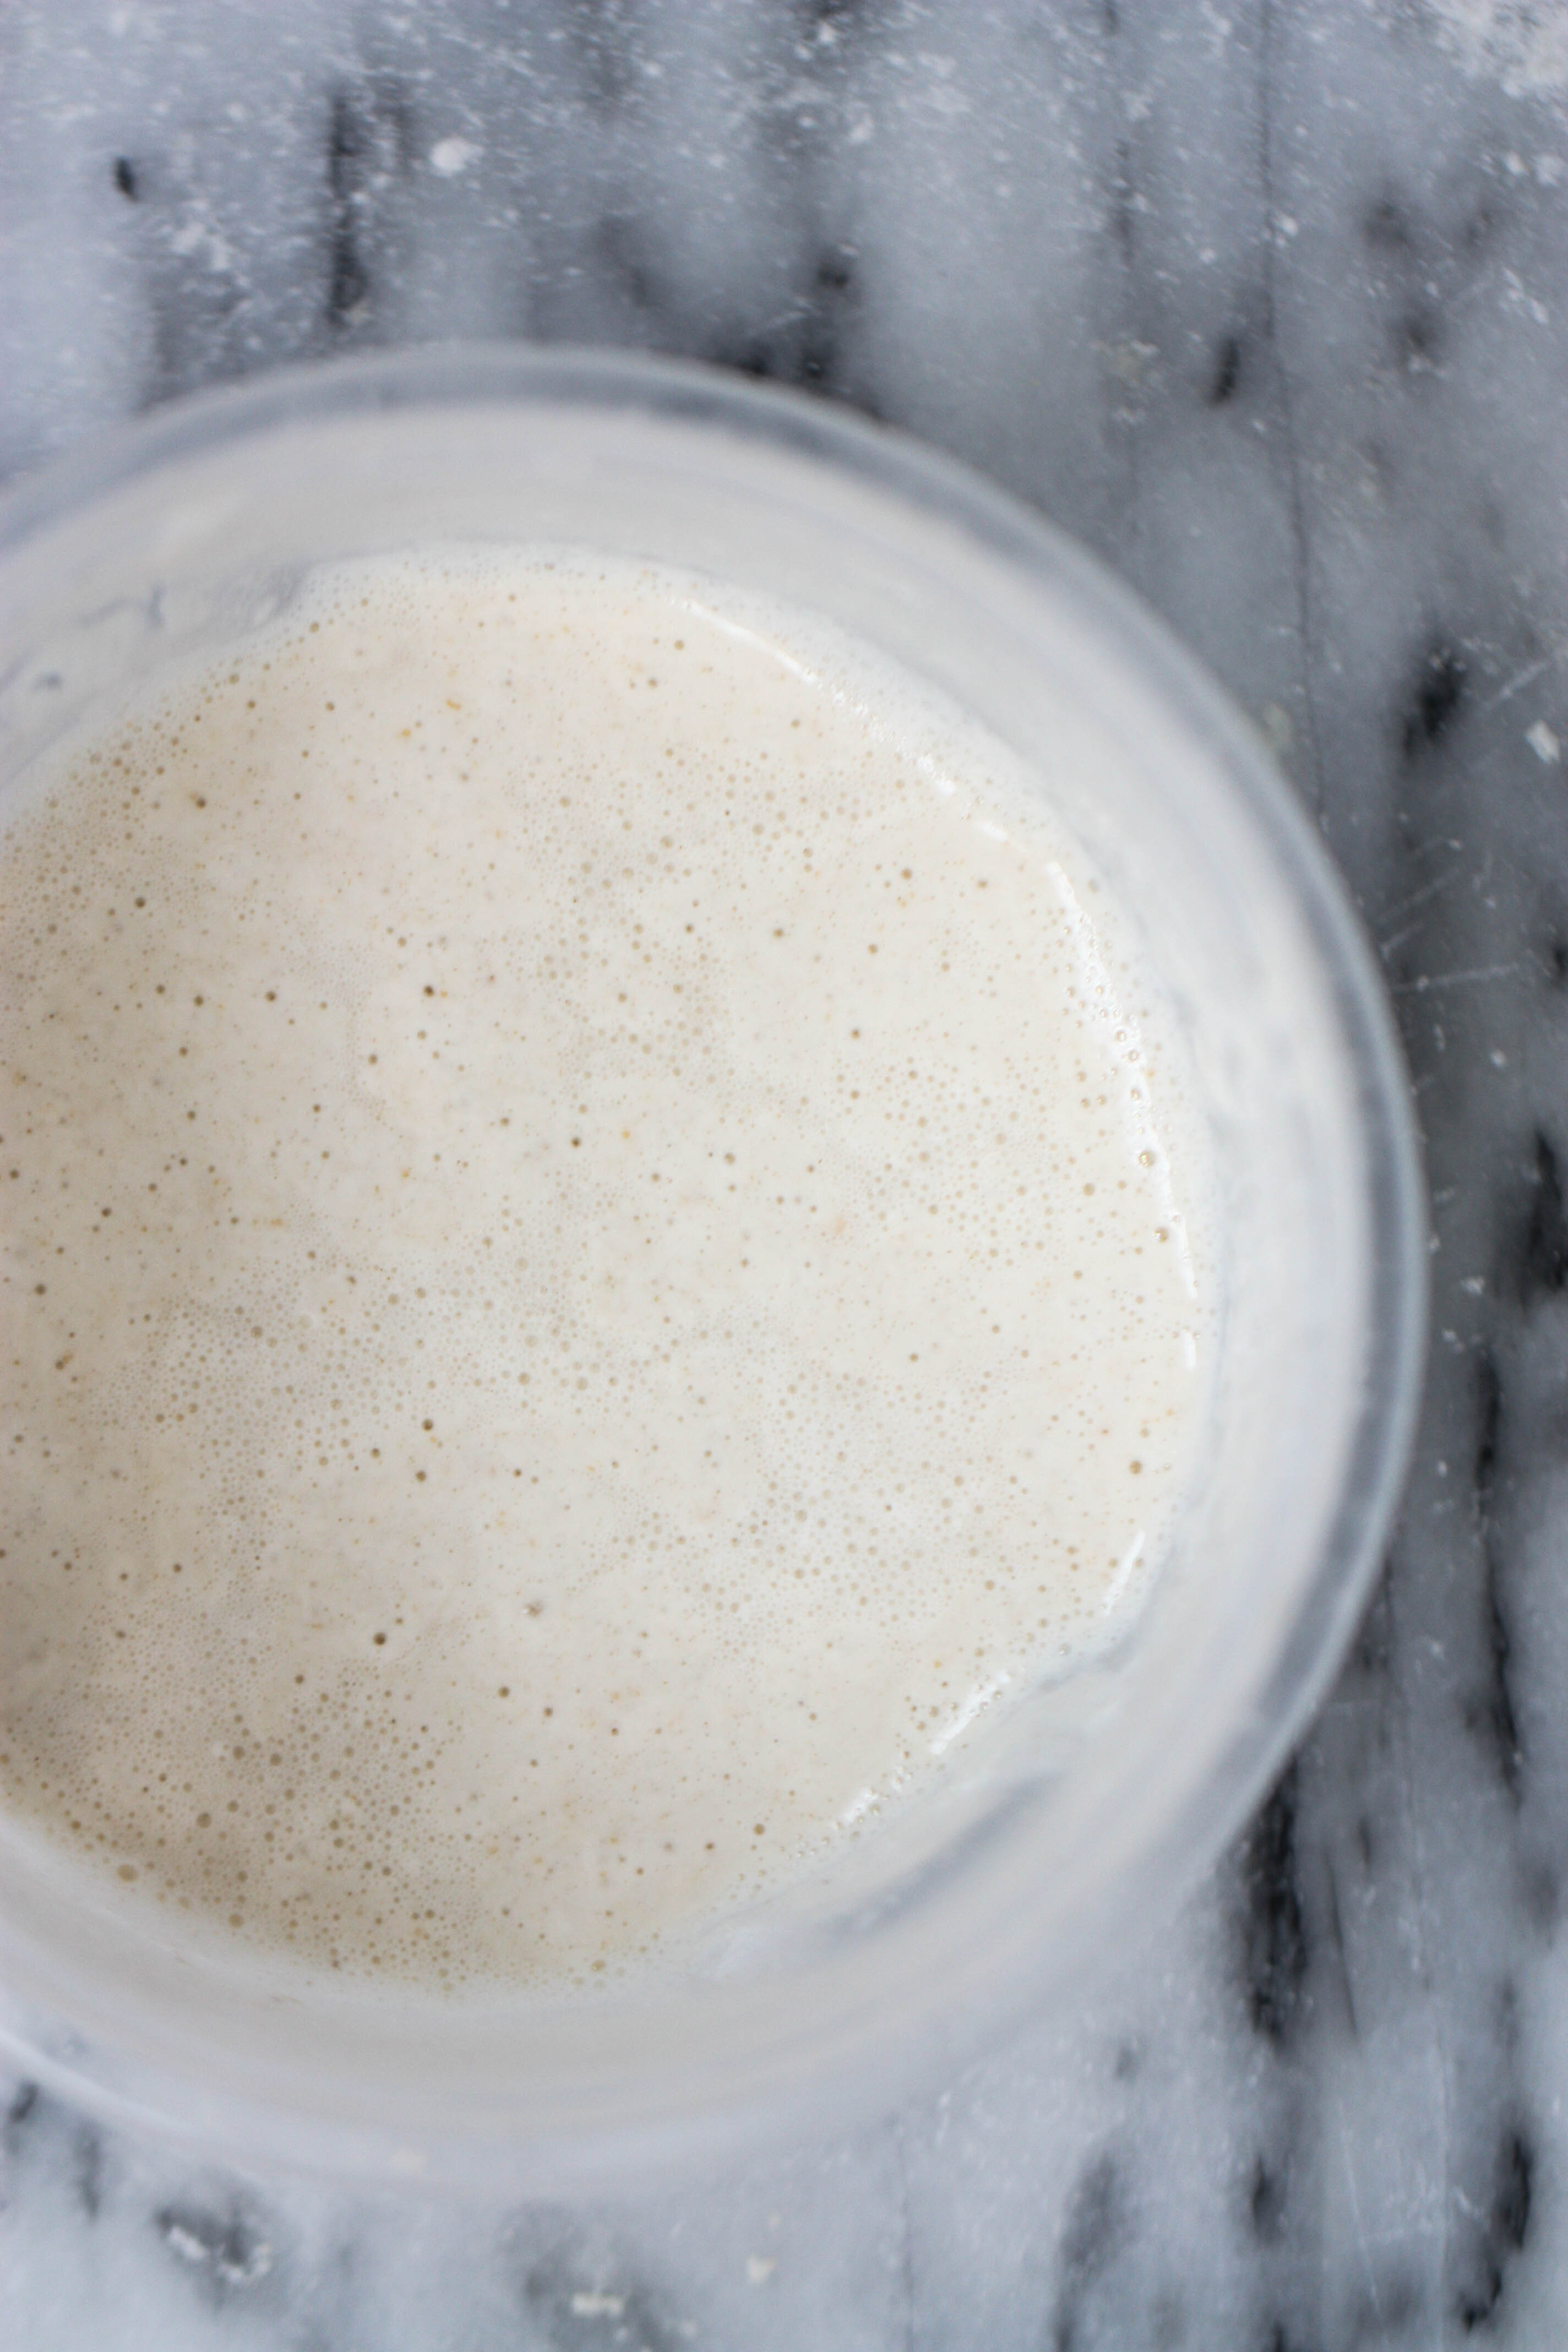
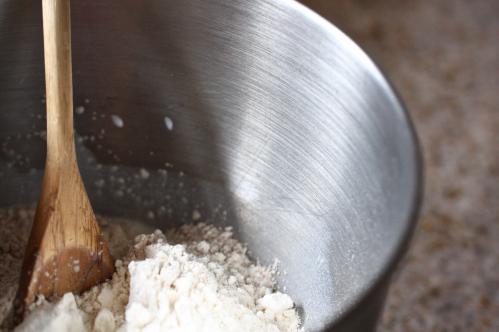
Fill a small bowl halfway with warm water. Add a big handful of flour (I use all purpose flour). Mix this together — the batter should be thick and have no lumps. Cover the bowl and place on the counter (away from the sun) for 2-3 days.
A few days later, your starter should be bubbly and might have a crust on top. Pull the crust back and do the first feeding.
To feed your starter — throw away about 80%. Add 1/4 cup water and 1/4 cup flour to the bowl and mix well. Do this every day around the same time for 3-4 days before you move on to actually baking bread. You want to make sure your starter is rising and falling before you use it to bake.
The night before you plan to bake, make your leaven. (Note that this recipe yields 1 loaf)
Right before bed, the night before you plan to bake your bread, take 2 spoonfuls of your starter out and put in a different clear bowl. Add 1 cup flour and 1 cup water. Mix well, cover with plastic wrap and leave on the counter while you sleep.
When you wake up, your leaven should look very bubbly, light and might even be frothy. Place a large bowl on a scale and measure out 100 grams of the leaven. Save the remaining leaven because that is your “new” starter.
Add 350 grams warm water (about 77-80 degrees but I never temp it) to the bowl and, using your hands, swirl the leaven around so that it dissolves in the water.
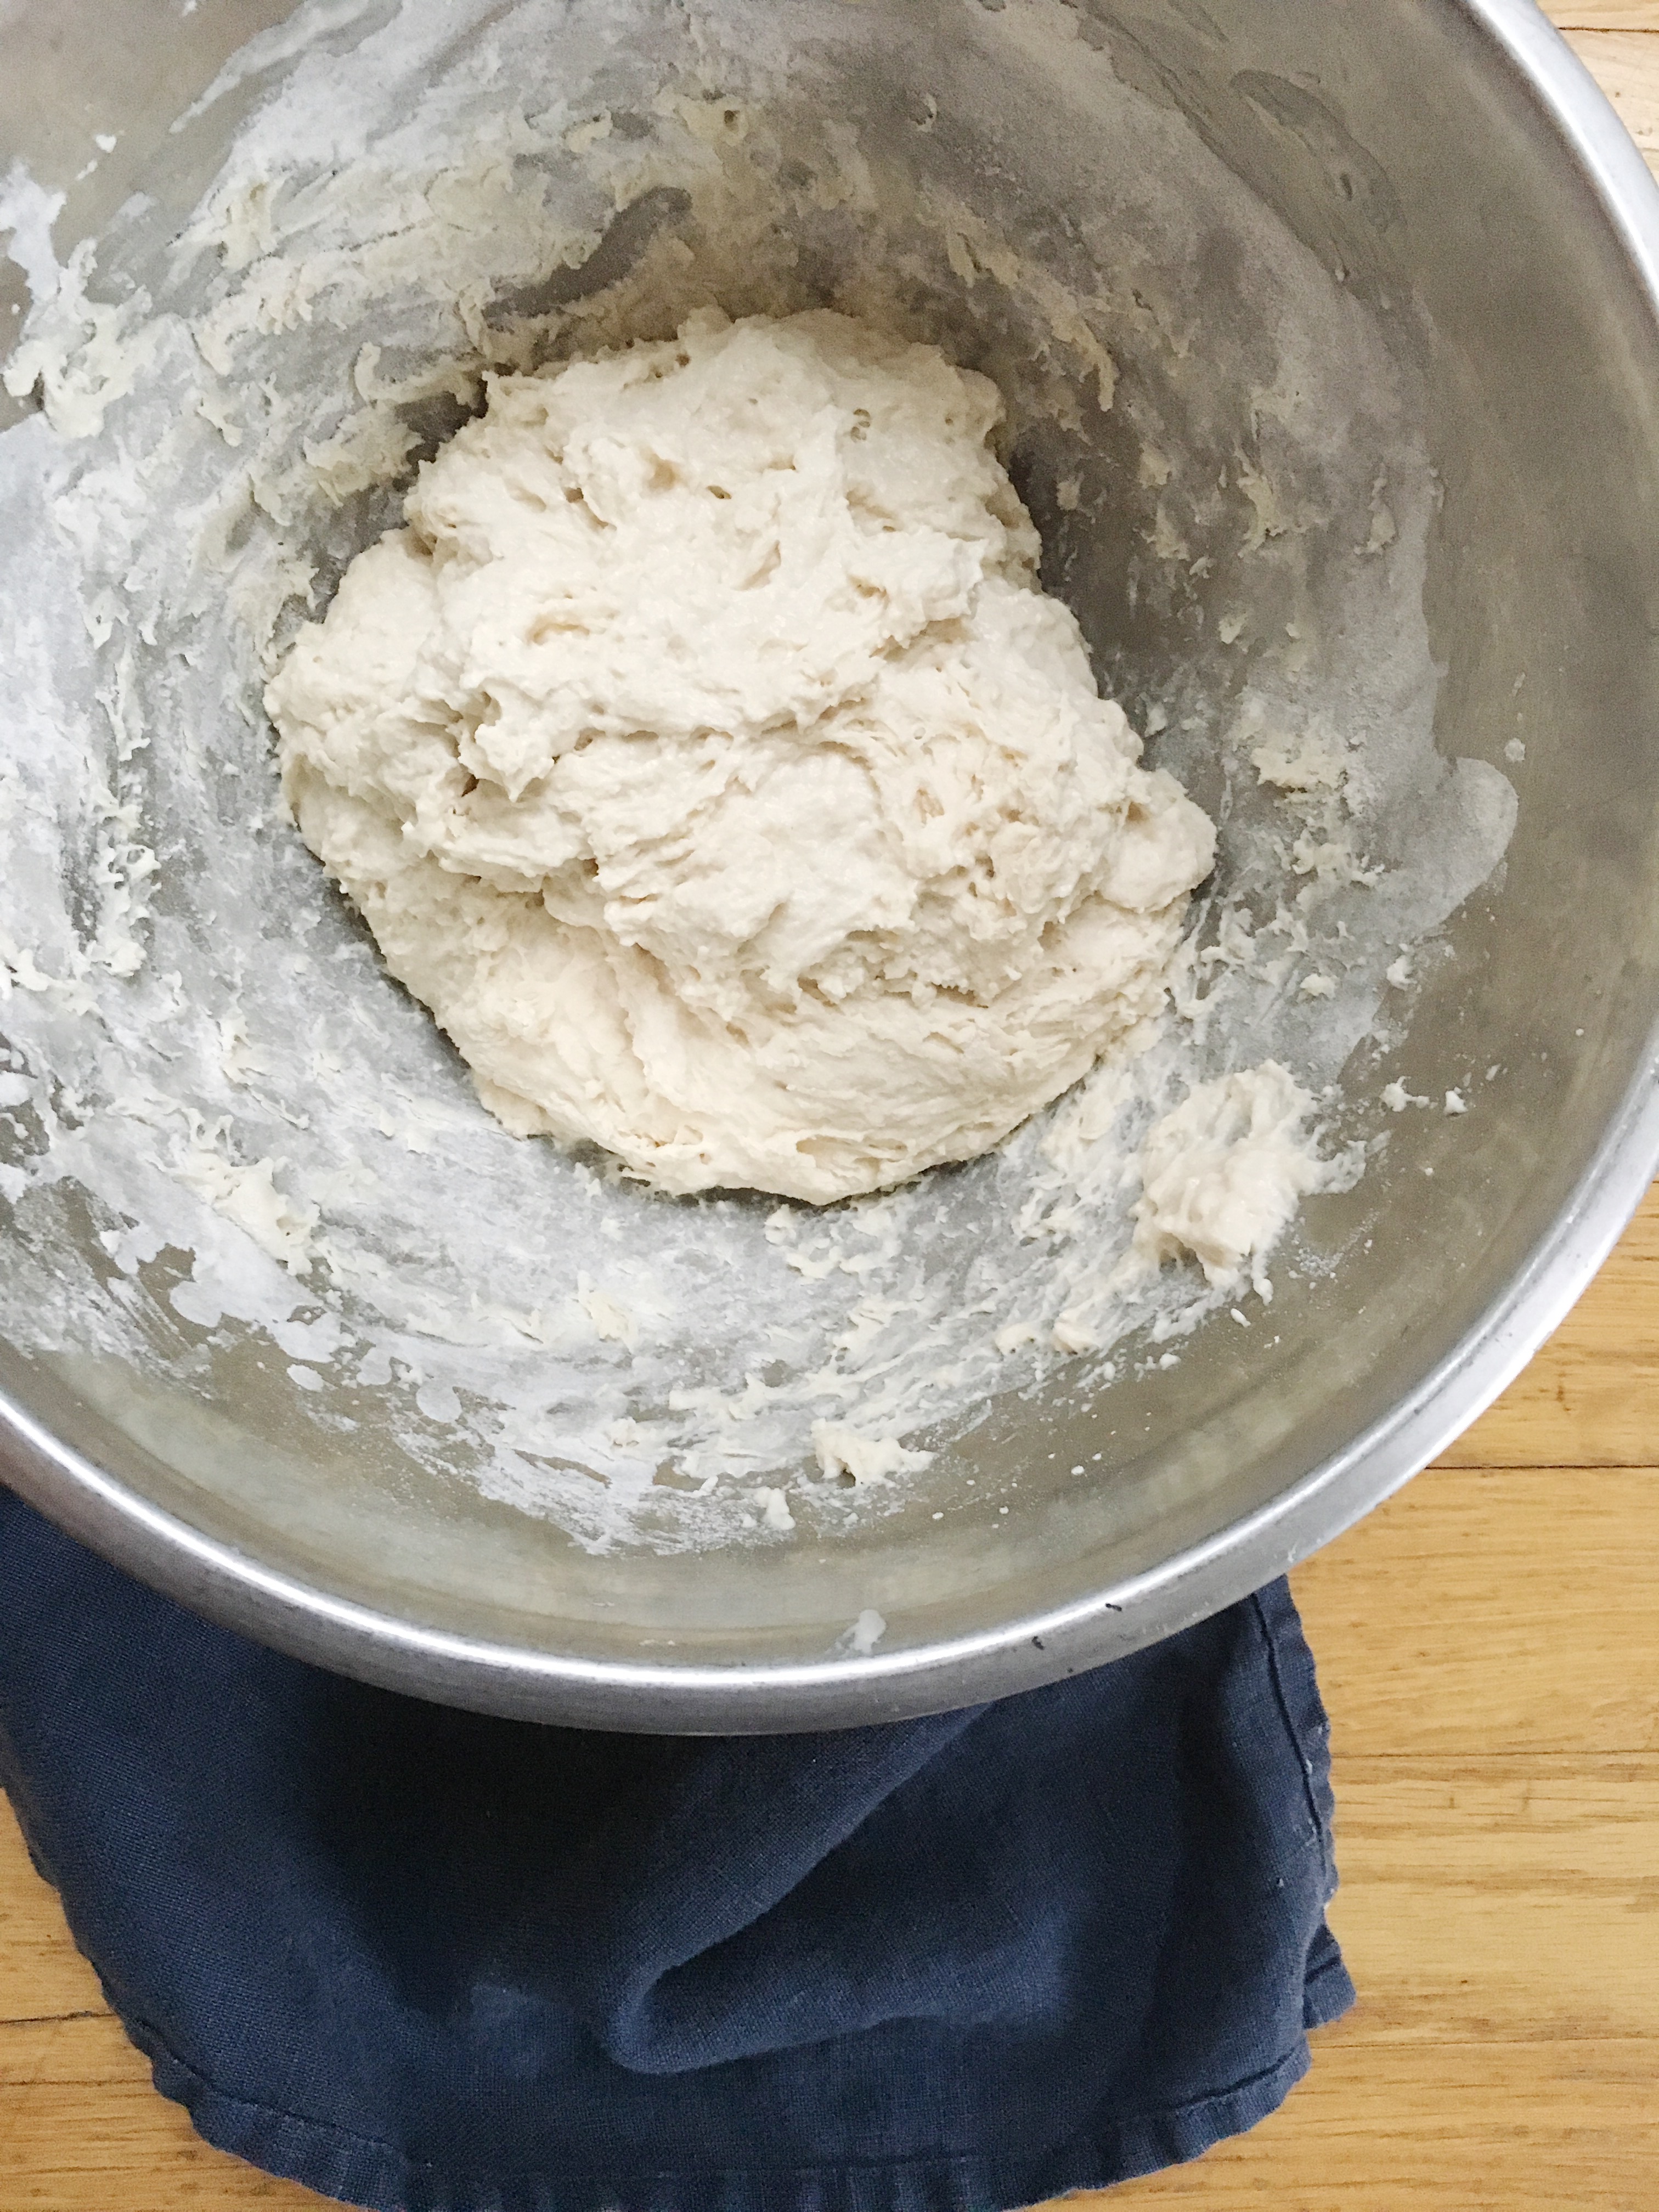
Add 500 grams all purpose flour and, using your hands again, mix everything very well so that no there are no dry spots. Cover with plastic wrap and let this sit for 30 minutes.
After 30 minutes, measure out 12 grams of kosher salt in a small container. I use a ramekin. Add 25 grams warm water and mix till the salt dissolves. Pour this salty water over your dough and work it in with your hands until you have a smooth dough. Place your plastic wrap back on. Your dough is made.
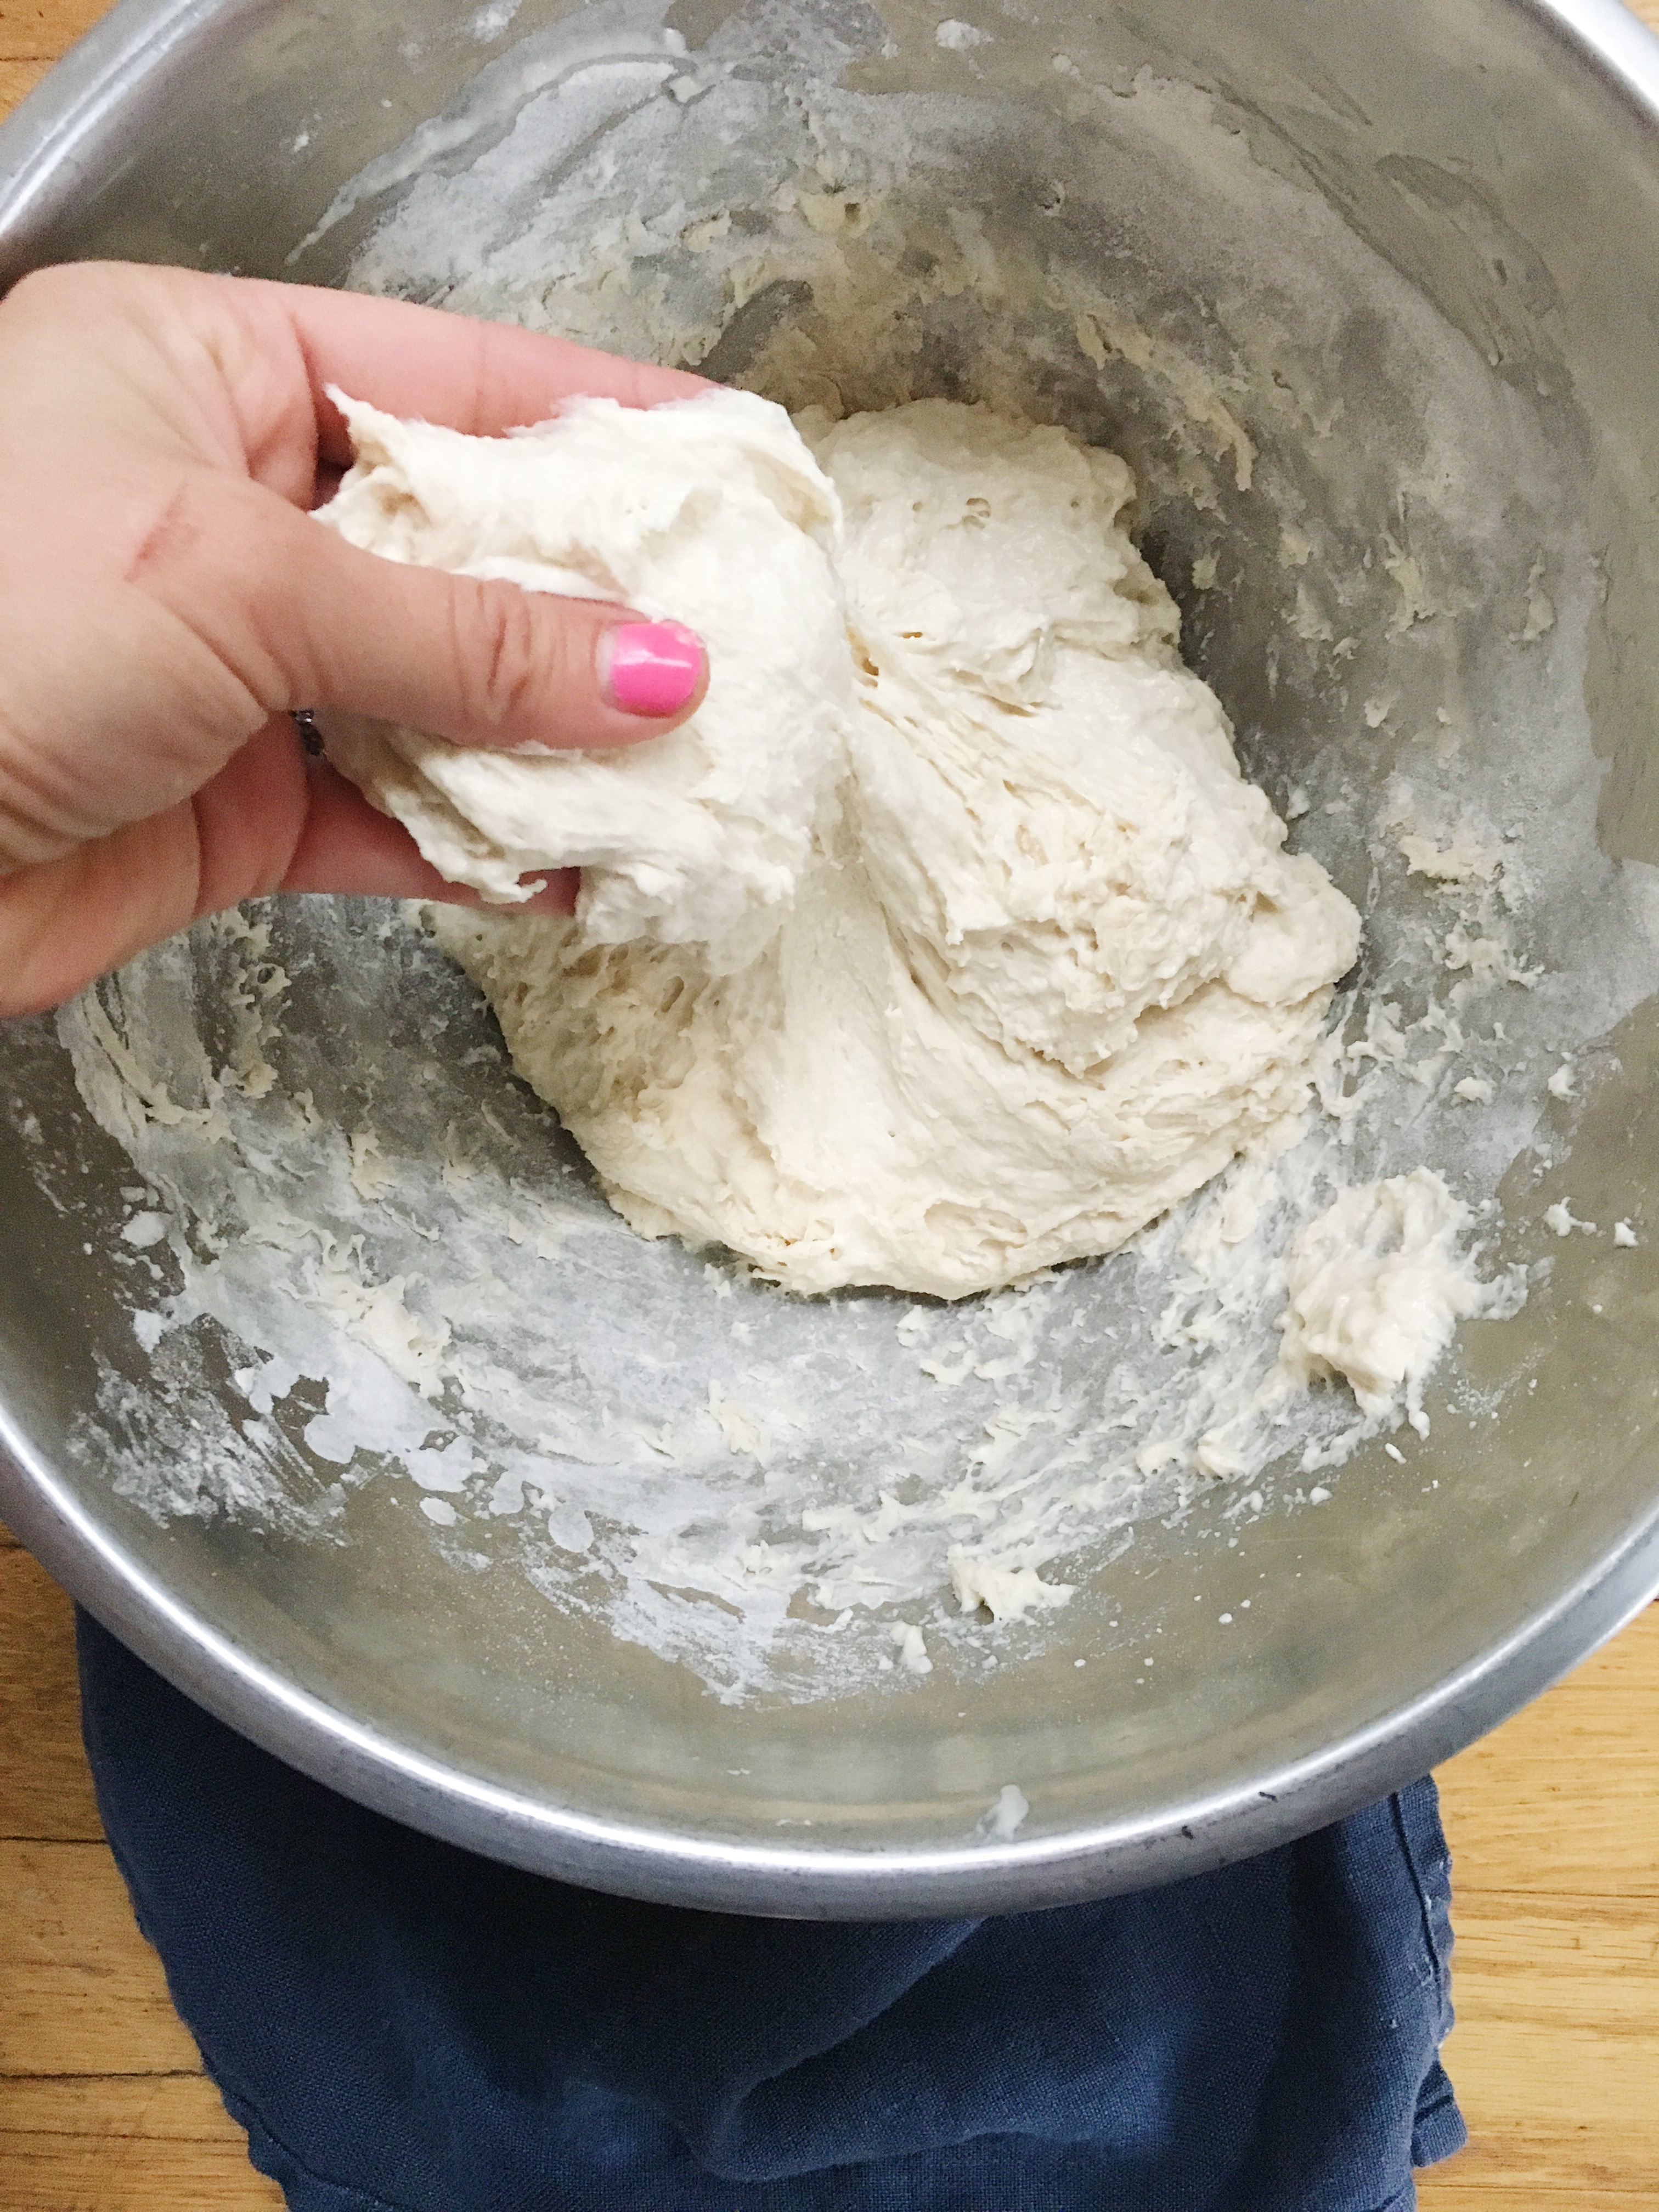
Leave this dough on the counter for 5 1/2 hours. Every half an hour (when you’re home) remove the plastic wrap and stretch out the dough on top of itself. To do this, just pull each side of the dough ball up and over itself. Then put the plastic wrap back on. I’m not religious about this and I don’t stay home all day to make sure all the turns are done. I just do the turns when I am home and don’t worry about it when I’m gone.
After 5 1/2 hours, place the dough on a floured surface and shape into a ball. Cover with the plastic wrap again and let it sit for 20 minutes. This is the bench rest.
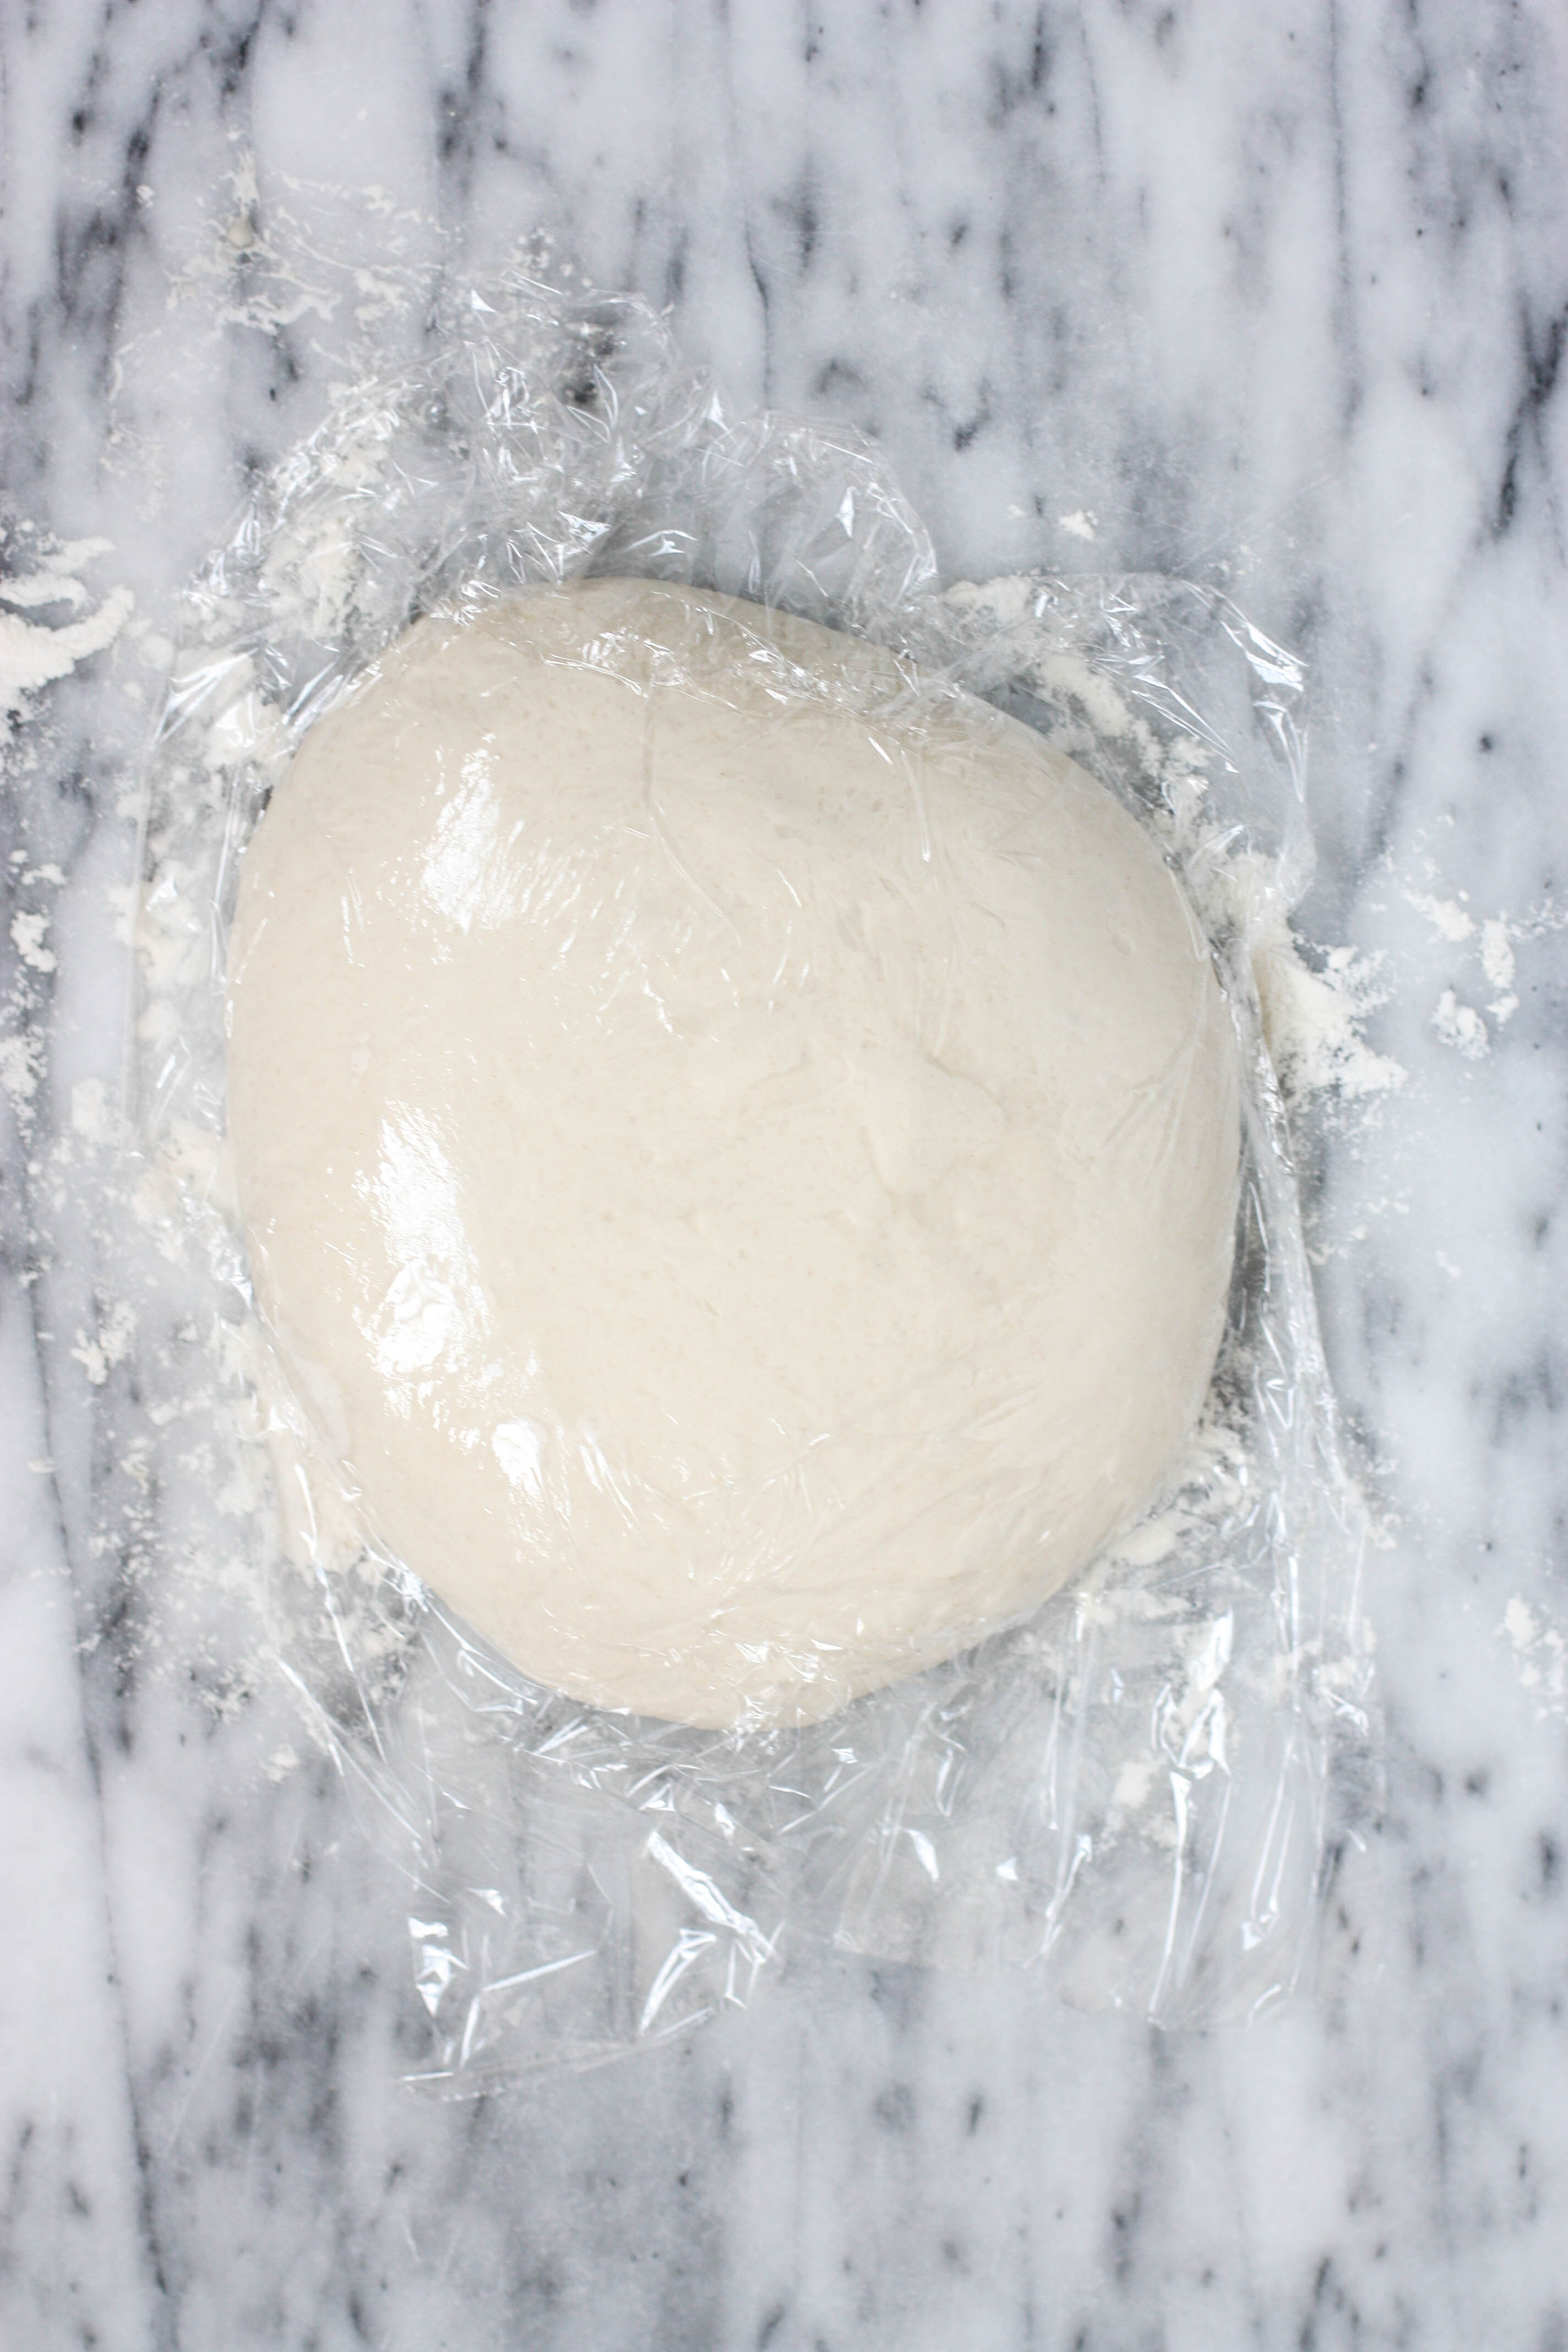
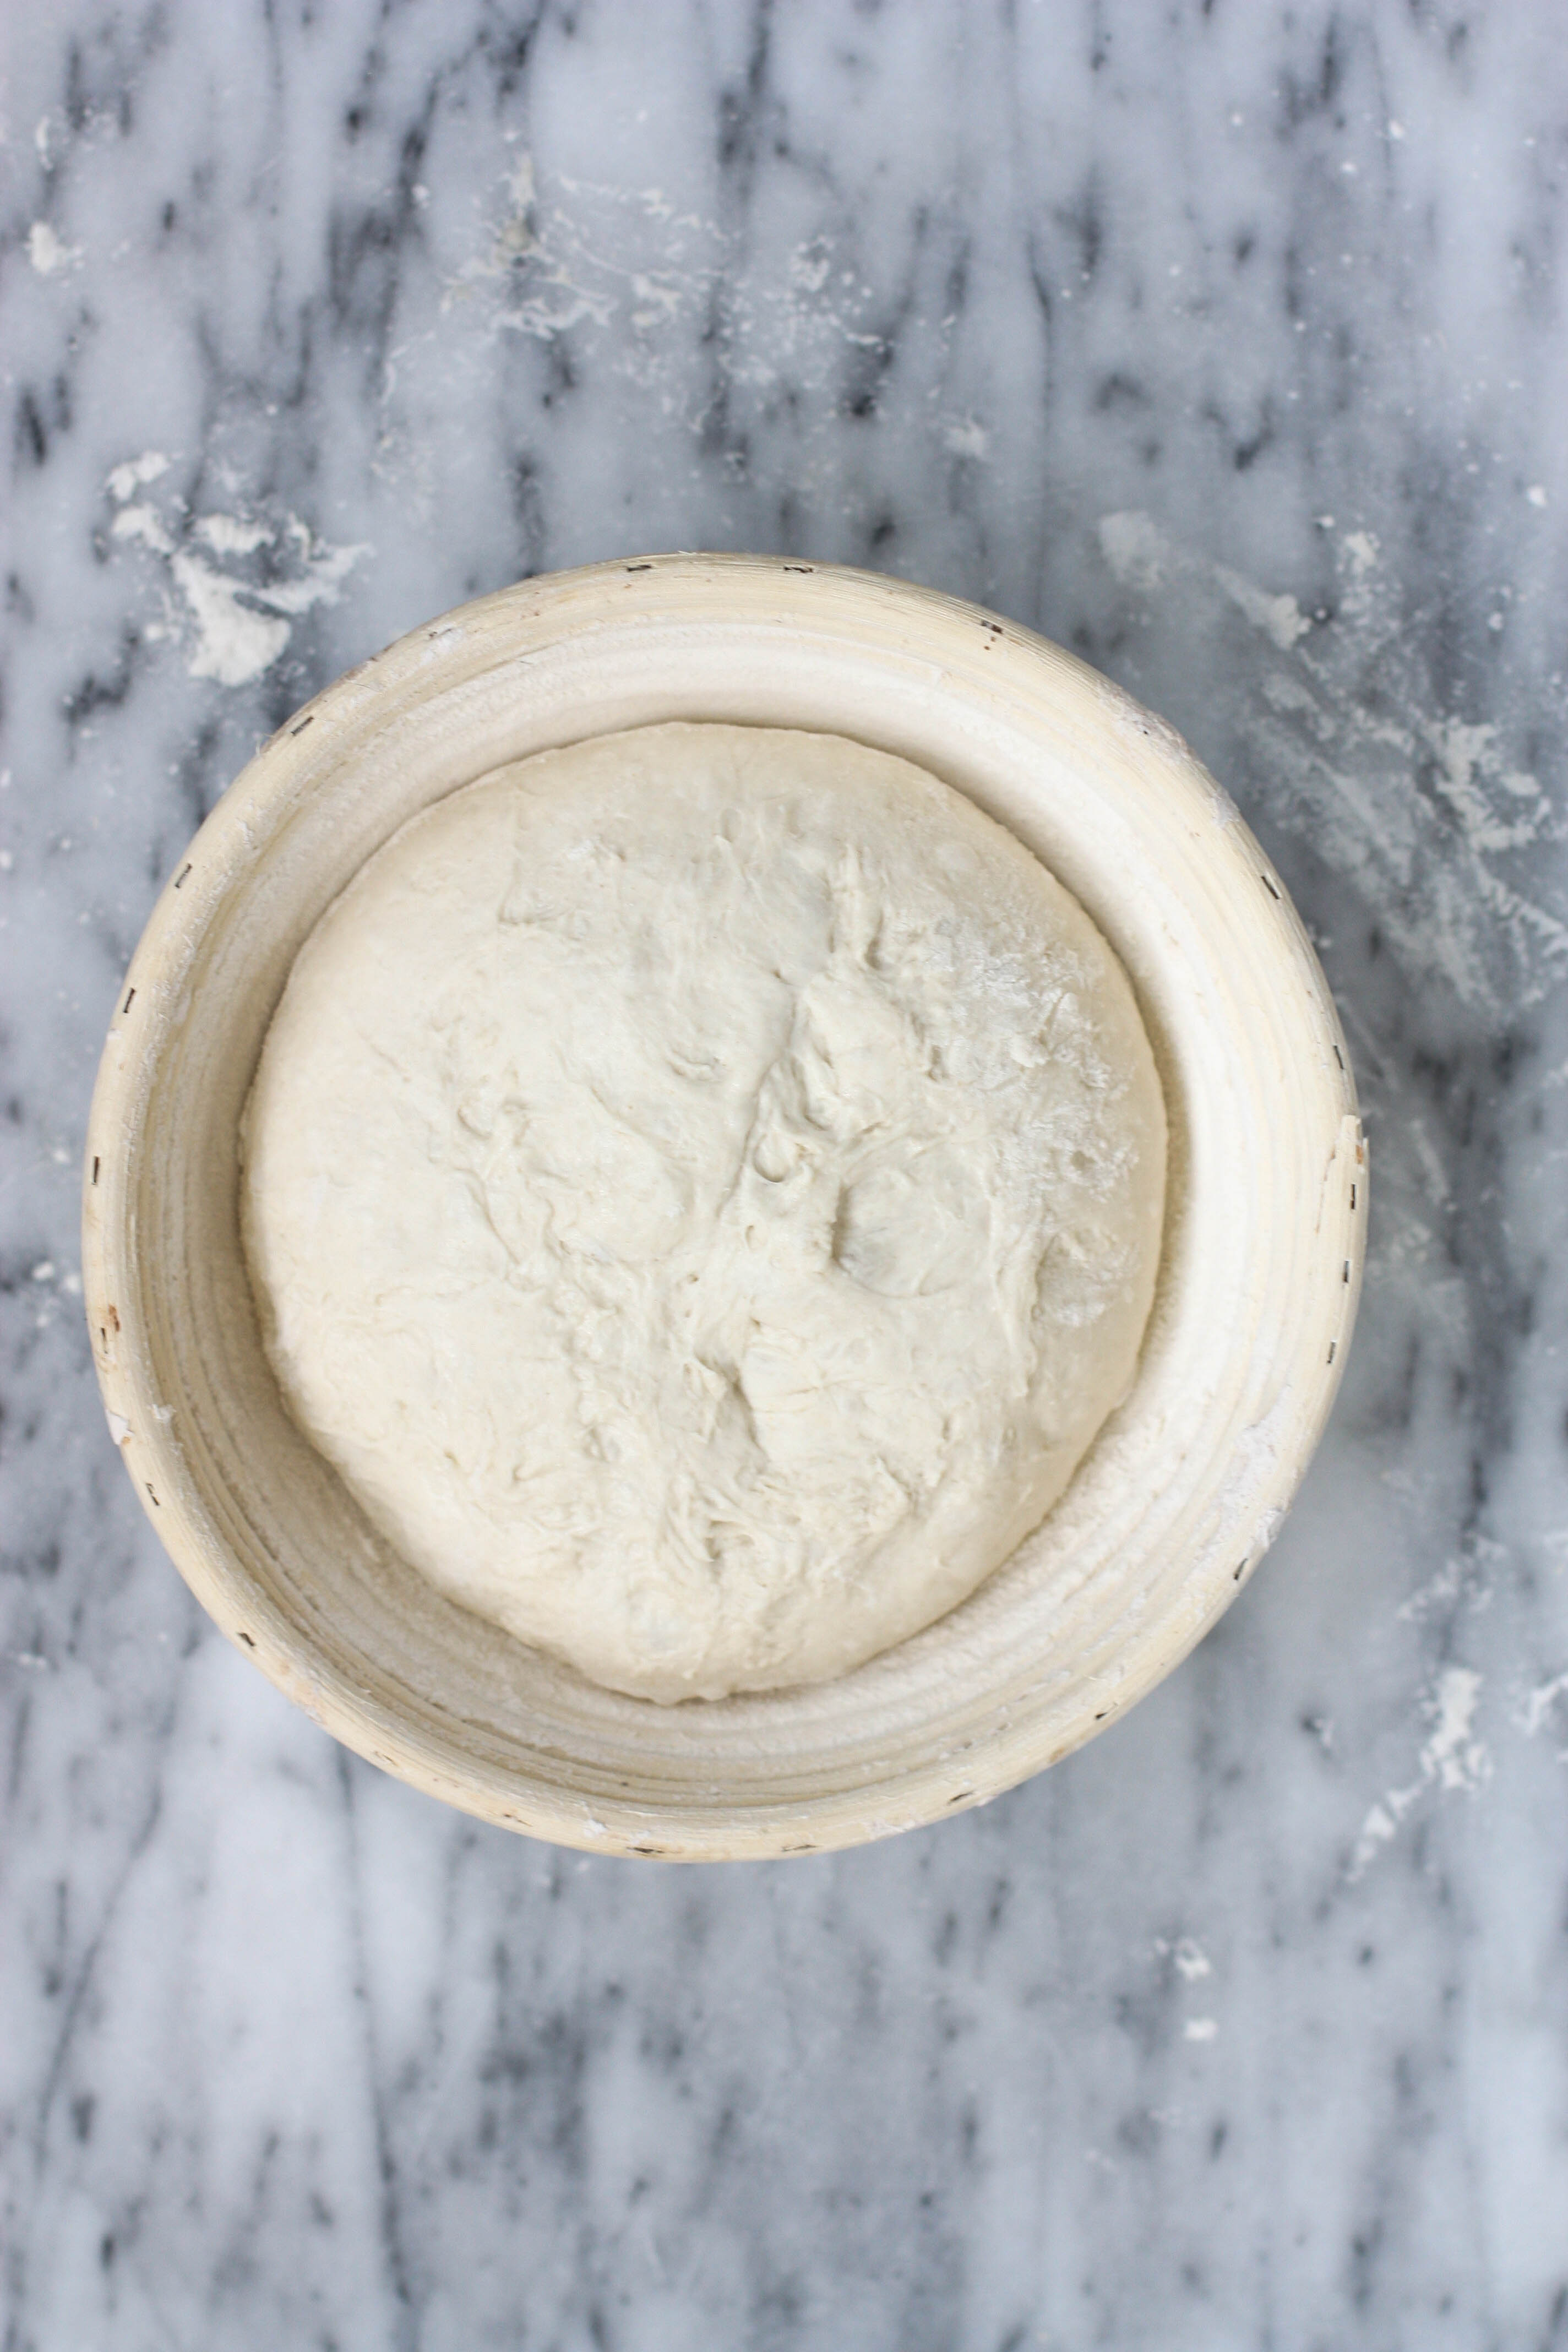
After the bench rest, gently flip your dough ball over (it will have spread out slightly and be sticky – not to worry). Fold the top third of the dough down into the middle and the bottom third up —- like a book. Fold the side in then flip the dough over again and shape into a ball. Place this ball into a bowl (seam side up) you have lined with a (very) heavily floured dishcloth or, what I use, a banneton basket that has flour in it. For flour here, I use a 50/50 blend of all purpose and rice flour. Cover your bowl or basket and let this sit for 2 – 2 1/2 hours.
You’re finally ready to bake!
Preheat your oven to 500 degrees and place a dutch oven (top and bottom) in. I used to use a Lodge (which I preferred) but am currently using a Le Creuset. It doesn’t really matter — any dutch oven is fine.
When the oven is ready, remove your HOT dutch oven VERY CAREFULLY. Place the dough ball inside (this takes practice and, probably at first, a ton of flour) seam side down. Use a knife or lame to score the top of the dough three times then quickly and carefully place the top on the dutch oven and put in the oven. Immediately lower your temperature to 475 and set your timer for 24 minutes.
When your timer goes off, carefully remove the dutch oven lid as fast as you can without burning yourself and close the oven again. Set your timer again for 24 more minutes.
When timer goes off, remove bread and let cool. “They” say to wait at least an hour – or preferably four – before slicing but who can really wait that long? Try to wait as long as you can though because it
‘s much easier to slice when cool and will stay fresher longer if you wait.
Some notes:
My method is different than Tartine’s because I have had way more success using all all purpose flour instead of the 50/50 whole wheat and all purpose blend that the book recommends.
I buy my flour in bulk at Costco because I save SO much money that way.
My kitchen temperature varies, but I would say it’s usually around 72 degrees.
You MUST have a digital food scale.
To make the hazelnut currant bread I always show on Insta-Stories, just add 1.5 cups toasted chopped hazelnuts and 1 cup currants to your dough after you make the first turn – about an hour into the first rise.
Now that I have a hang of this, I can bake bread even on my busiest days. It really requires such little work once you get the hang of things. I just start my dough at 6:30 when I get up, place on the
counter for the bench rest immediately when I get home from picking up Grayson from school at 1pm and I bake right after the kids wake up from their nap at 3:15ish. The bread is always still warm for dinner that way. 😉
Leftover COOLED bread will keep for 5-6 days in a ziploc bag.
So there you have it!
With a little time, practice and patience, you, too, can create absolutely delicious bread at home. 🙂
- 2 tbsp starter
- 1 cup flour
- 1 cup water
- 100 grams leaven
- 350 grams warm water
- 500 grams flour
- 12 grams kosher salt
- 24 grams water
-
The night before you plan to bake, make your leaven by mixing together 2 tbsp starter with 1 cup flour and 1 cup water. Cover and let sit at room temperature overnight (6-8 hours).
-
In the morning, weigh out 100 grams of the leaven. Mix with the 350 grams warm water until all leaven has been dissolved. Add 500 grams flour and mix with your hands until no dry spots are there.
-
Cover and let dough rest for about half an hour.
-
Mix together the 12 grams salt with 24 grams water. Pour this over the dough and mix well to incorporate. Cover the bowl.
-
Every 30 minutes (that you're around), "turn" the bread by lifting and stretching the bottoms of each side up and over on top of itself.
-
Let dough rise (bulk fermentation) for about 5.5-6 hours. Then, place dough on a floured countertop. Gently shape into a ball and cover with plastic wrap. Let rest for about 20 minutes.
-
Shape dough by flipping it over and folding the top and bottom thirds into the middle, and the sides in as well ---- sort of like a book. Flip the dough back over and shape into a ball. Extra flour is fine here. For this step, I use a blend of rice flour and regular flour.
-
Place dough ball into a banneton proofing basket (that has been thoroughly floured!!) or a floured dishcloth set inside a bowl. Cover and let rise for about 2 hours.
-
When you're ready to bake, preheat oven to 500 degrees. Place a dutch oven inside the oven to heat up. Carefully remove the dutch oven once hot and flip your dough inside (this takes a bit of practice but I know you can get it!). Score the top of the dough 3 times with a lame or knife. Immediately place hot cover on the dutch oven and lower oven temperature to 475.
Bake for 24 minutes. After 24 minutes, remove the cover and continue baking for another 24 minutes.
-
Let bread cool thoroughly propped up before slicing. At least an hour.
You'll never want "normal bread" ever again. Don't give up!!!!


Lynn
July 30, 2017 at 5:11 pmOh! I miss the bread for breakfast, with cheese that we had every day that I was there ~
Katie
July 30, 2017 at 5:23 pmWhat a great post! I love seeing your bread baking routine on insta stories!! Speaking of, step 7 is a little confusing to me. Is there anyway you could show it on instagram the next time you do it? You are super inspiring to get people to try baking at home.
Jen
July 30, 2017 at 5:33 pmI have been waiting for this – thank you!! I have been watching your insta-stories and have gotten as far as prepping my starter. You have inspired me to give this a go. Thx for explaining this so well!
How to Make Sourdough Bread at Home (Step by Step) – Gym Buddies
July 30, 2017 at 8:16 pm[…] post How to Make Sourdough Bread at Home (Step by Step) appeared first on Eat, Live, […]
CiAnne
July 30, 2017 at 9:26 pmSo inspiring! When you say “this is your new starter” in regards to the leaven, do you add it to your starter mix? I assume you would continue to feed the starter that you took the 2 spoonfuls from?
jenna
July 30, 2017 at 10:08 pmNope! You toss the old starter. Your new starter is the leftover leaven.
Lora
July 30, 2017 at 10:27 pmI want to thank you again for turning me on to the Tartine recipe. The technique is what has made all the difference. My husband is thrilled to have homemade sourdough every day now!
Tara
July 31, 2017 at 3:48 amSo so glad you wrote a detailed post about this!!!! Cant’ wait to try it for myself!!!
Mary
July 31, 2017 at 5:49 amThanks Jenna for this post!
lisa
July 31, 2017 at 5:56 amHow many days does the new starter have to be fed before you can bake with it? Thanks!
jenna
July 31, 2017 at 6:28 amI would say 3 days 🙂
Lisa
July 31, 2017 at 6:59 amSorry to ask so many questions. But just to clarify, the leaven as your new starter should be fed for about 3 days too before baking? thanks again!!!
Chelsea
July 31, 2017 at 6:31 amQuestion about throwing away the starter – why do you throw away 80% of the starter every time you feed it? When you talk about measuring out 100 grams of the leaven to make the bread and then leaving the remaining leaven as your “new” starter, what’s the intention around this? Is this just so you don’t end up with heaps and heaps of starter? I’ve never understood the idea about throwing away starter so any insight would be awesome 🙂
Ashley L
July 31, 2017 at 8:54 amI could be wrong but I think it’s because you’re “feeding” the yeast fresh sugars and starch. It rises when it “eats” and falls when there isn’t anything left to eat.
jenna
July 31, 2017 at 9:16 amYou do this for two reasons — one – you don’t want to end up with like 5 cups of starter. two – you want your starter to stay fresh and by either making leaven or feeding your starter (and discarding), you are ensuring your starter always stays fresh and fed so it doesn’t become, basically, vinegar.
Caity
July 31, 2017 at 7:05 amIs there any yeast in the starter? I don’t think your recipe mentions it, but I want to make sure! Thanks for sharing
Amber
July 31, 2017 at 7:32 amleaving it out on the counter for 3 days creates a natural yeast. the natural bacteria in the air creates the yeast flavor in the starter- hence why different areas of the world have different “sourness” to their bread. San Francisco is famous for sourdough because they naturally have a different bacteria that creates that popular sour flavor 🙂
Mary
July 31, 2017 at 9:48 amJust to confirm, the oatmeal bread is from Tartine’s #3 book? When looking on Amazon at the contents page I don’t see that recipe???
jenna
July 31, 2017 at 10:02 amit is – they call it porridge bread 🙂
Mary
July 31, 2017 at 1:49 pmYour the best Jenna!
Victoria
July 31, 2017 at 10:29 amJust to clarify! So no exact measurements for the starter?!
Caitlin Wallace
July 31, 2017 at 10:38 amThis post clearly took so much work and care. Thanks so much!!!!
erica
July 31, 2017 at 12:29 pmthank you so much for writing this!! could you clarify what you mean by folding the top and bottom thirds like a book? I’m having trouble picturing this…
Meredith
August 1, 2017 at 6:15 amErica, think of it like folding a piece of paper in order to fit into an envelope.
Jennifer
June 12, 2020 at 11:25 amHi! I’ve been admiring your posts on IG and followed this recipe to a T but my dough turns out really soupy- it has to be poured, any advice?
Debi
July 31, 2017 at 3:49 pmThanks Jenna for taking the time to write this post! I have failed at this process before, but now I want to try it again. All of your bread posts on Instagram are very inspiring!
Karen
July 31, 2017 at 5:36 pmThis is a dumb question, but when you say 100g of water, are you measuring it in a measuring cup? Or weighing it on the scale?
jenna
July 31, 2017 at 5:41 pmscale 🙂
Katie
July 31, 2017 at 8:11 pmAnother leaven/starter question. How often should you be feeding it if you’re not baking regularly like you’re doing? I’m thinking vacation, etc. Also when you save the leaven as the new starter, do you save it in a cleaned jar or just put in the uncleaned one? I was just gifted a starter today so trying to figure this out! Thanks!!
jenna
July 31, 2017 at 9:09 pmFeed it daily. If you go on vacation, stick it in the fridge and it will be fine 🙂 I just rinse out the jar that the “old” starter was in (with water) and then put the “new” starter in.
Alison (Fueling for Fitness)
August 1, 2017 at 3:38 amThank you for sharing! I’ve been experimenting with making sourdough again after being gifted some starter from a coworker. Question for you – are there any benefits to using one of the bannetons with a cloth insert? I was thinking about buying one (am currently using a giant soup bowl with paper towel and the only way my dough will come out is if I stick it in the fridge over night…which is maybe why my bread has never risen as beautifully as yours.
Meredith
August 1, 2017 at 6:18 amI tried this yesterday since I had a starter ready. Mine was a bit flat, but despite that was great! I’ll keep at it. Thanks, Jenna!
Ashley L
August 1, 2017 at 2:14 pmGoing to try your method. I’ve made tartine’s method before but I was never thrilled and I just tried it again with hard whole wheat flour and it didn’t work at all. So I think I’m going to try your white flour version. Who needs whole grains anyway? ?
Megan
August 1, 2017 at 5:50 pmYou’ve got me all fired up to make my own sourdough!!! I’m on day 2 of getting my starter going and there are no bubbles and no crust. Should I throw it out and start again or just give it more time? Any tips for a novice?
jenna
August 2, 2017 at 1:52 pmKeep it! See what happens today.
Katie c
August 1, 2017 at 7:08 pmThank you so much for this post! I started attempting baking bread a few weeks ago to have had many failures. Your recipe seems much easier than the one I was using! Any tips for a loaf that keeps coming out flat as a pancake ( but still tastes amazing- just suuuper dense) i live in the south so I’m wondering if the humidity has anything to do with it!
Sophie
August 1, 2017 at 7:32 pmOh my goodness I want to make this so bad. I can’t do gluten, but want my family to have healthy bread. Ha the question is will I be able to not try it too (if it doesn’t flop!).
Caitlin
August 3, 2017 at 11:36 amLove this! You’ve inspired me to pick up my Tartine 3 book again! And to try it with all AP flour. Question for you though, how do you store your flour since you buy in bulk? Any containers you would recommend?
Christina
August 6, 2017 at 4:45 amI am in the process of this now and baking today. Here is where I’m confused though! Now that I have a starter, if I don’t plan to bake everyday do I put this in the fridge? Where do I begin when I want to bake? Do I take 2 spoonfuls and make a new leaven and at that point do I need to add or discard any of my old starter(feed)? Hoping someone can help me out. I’ve only ever baked cookies! But your pictures and these instructions are so inspiring!
Aimee Peterson
August 22, 2017 at 7:57 amI’ve been leaving my starter on the counter and just feeding it every day (discarding all but 2 tbsp in the morning and feeding it w/ 1/4 cup water and 1/4 cup flour). I suppose I could keep it in the fridge during the week but I haven’t played around with that yet. If I did do that then I would start out by taking it out of the fridge on Thursday morning, and either taking out 2 tbsp and feeding as mentioned above and see what happens (expecting that I will be baking the bread Saturday). If that didn’t work out well then I would take out of the fridge, feed with water and flour WITHOUT removing any of the starter and see what happens. Then Friday I would probably take out 2 tbsp and feed as normal. Does that make sense? Basically, I would just trial and error my way through it. It’s really hard to kill your starter unless you just don’t feed it so experiment! I have two starters going right now from baking last weekend and they are thriving on the counter…I am trying to figure out how to make more than one loaf on the weekend…Good luck!!
Tracy
August 6, 2017 at 11:42 amI remember those early morning bakery days! I’ve read your blog since way back before then 🙂 Glad you’re blogging again. I never gave up on you!
Frannie
August 6, 2017 at 3:29 pmHi Jenna,
I just baked my first loaf and it came out sort of gummy. I also burned the bottom of the loaf. BUT… it was still pretty good! The top crust was great. Any suggestions regarding the gumminess? Thanks!
Sarah
September 3, 2017 at 7:49 pmI love you! I have struggled with the tartine method, followed your suggestions and have an amazing looking loaf on my counter!! Keep up the good work!
Mary
September 6, 2017 at 7:35 amHi Jenna, I am wondering if your starter has ever had a thin layer of water on the surface? I made a starter last night and today it has a thin watery layer on top…is this okay?
jenna
September 6, 2017 at 10:08 amyes! Just pour it off.
Mary
September 10, 2017 at 9:43 amThanks! after mixing equal parts water and flour I was able to get a good bubbly starter going. I have been feeding it for 2-3 days and it has never been as bubbly as it was before I started feeding it. There are hardly any bubbles anymore and so I do not think it has been rising/falling so it would not be ready to bake. Any ideas of what I could try? Thanks!
jenna
September 14, 2017 at 1:28 pmHmm…I would probably try baking with it and just seeing what happens! Mine doesn’t rise a ton, either, in between feedings. Just try to make some leaven with it and see what happens.
Katie
October 3, 2017 at 5:28 pmOk so I’ve tried making the starter several times and killed it at the feeding stage. This has been driving me crazy, but I think I’ve figured it out. Start over and make sure you don’t use metal utensils or bowl bc the metal somehow kills the natural yeast. I’ve finally got a nice bubbly starter! Good luck ??
Joanne
April 20, 2020 at 6:31 pmHi ! I’m attempting this now! Should I pour that thin watery layer off now or wait until the 3 days is up? I just made the starter last night so its only been 1 day.
Katie
September 20, 2017 at 1:47 pmI was having the same problem. From what I’ve read on other bread baking forums, it’s too much water for the feeding. They say you should feed equal WEIGHTS water and flour as opposed to volume. Your starter should be thicker and prevent the layer of water from separating out.
Mary
October 5, 2017 at 8:39 amThis is what helped me! I started weighing the flour and water when I fed the starter. I added 40 g each. I got an amazing starter which resulted in a super bubbly leaven and passed the float test! I just made 1 country loaf and 2 oatmeal loaves and I am super happy with the results. Thanks, Jenna for all of the tips and techniques you shared and for motivating me to finally bake some amazing bread. Now my goal is to continue this awesome hobby and bake once a week! 🙂
Hailey
September 10, 2017 at 1:59 pmIs there a video that you recommened? I’ve never baked sourdough from scratch and I would love some photos or video of what the starter/leaven should look like.
jenna
September 14, 2017 at 1:27 pmI am not sure on videos (I don’t have one that I personally love and recommend) but I am SURE there are tons on Youtube that would better instruct!
Kim
September 14, 2017 at 10:06 pmhttp://foodwishes.blogspot.com/2017/08/sourdough-bread-part-1-lets-get-this.html
chelsea
September 11, 2017 at 6:23 pmJenna. Thanks for helping us all become bread makers! I have made my starter…let it sit…and poured off 80% and added new flour and water. Today is the “next day” after that first feed. Am I supposed to pour off 80% with each feed or just keep adding water and flour? So sorry to need this help. This is such a fun project!
jenna
September 14, 2017 at 1:26 pmYes. Always discard 80% before feeding when you’re not baking. 🙂
Lydia
September 13, 2017 at 12:30 pmAfter I feed the starter so I cover it as well or leave uncovered?
jenna
September 14, 2017 at 1:25 pmI leave mine with the top on the jar, but askew. So, just the top laying on the jar. 🙂
Kim
September 14, 2017 at 10:04 pmWhich dutch oven do you use to bake your bread? What size?
Thanks!
jenna
September 15, 2017 at 12:40 pmI use a Le Creuset 5 quart dutch oven.
Elizabeth
September 19, 2017 at 11:23 amI have been feeding my starter daily for three weeks but I haven’t seen it rising and falling. It looks like your picture above but it doesn’t seem to rise and fall. Do you think I should just start over with this starter or just try to bake a loaf and see what happens?
Kristin Murdock
September 19, 2017 at 1:49 pmHi Jenna! I love your stories and this post is amazing! I have one question – do you use water straight from the tap for your bread?
Lydia
September 27, 2017 at 11:17 amBefore the bench rest, my dough is soooo sticky- I can barely shape it into a ball as it keeps spreading and I have to keep adding flour. Is this a sign that it’s not going to work? Thank you!
Katie
October 21, 2017 at 5:31 amI’m having the same problem!
Jenny
October 11, 2017 at 1:03 pmSo now that the leven is now the starter, how do you feed it? And where do you store it?
Karin
November 8, 2017 at 11:59 pmHi Jenna! This post is so great, have been baking from this recipe successfully for a couple of weeks now. I have a quick question, if I want to bake in the morning and not late afternoon, how do I do that? Should I do everything up to the last proofing and then stick it in the fridge for the last part or how do you do it to bake in the morning? Thanks from Sweden ?
Caitie Baldock
December 22, 2017 at 4:05 pmHey Jenna!
I have baked sourdough based off your recipe probably 10 times (and love it!!). It is always so crunchy on the outside the first day and then after the crust gets soft (still so yummy toasted…and still yummy untoasted, just chewy). Does your hold the crunch for longer than the first evening?
Nikki
December 27, 2017 at 8:09 pmJenna – I have been using the Sullivan Street bakery cook book recipe to make a starter… and actually, I think I used yours a few months ago — neither time was I able to make a starter successfully 🙁 I don’t know what I’m doing wrong! Right now, it is like a super thick pancake batter, but it’s not bubbling much, it’s not increasing in volume, and I’m feeding it about once a day. Any tips? I’m using the same AP flour you use from Costco, too!
Caitlin
April 20, 2018 at 5:34 amHi Jenna! I just wanted to thank you for this tutorial! I have been wanting to try my hand at sourdough but was too intimidated. Well, I tried your recipe and I’m addicted to it now! I think the first week I ended up making 4 loaves…co-workers were very happy 🙂 Thank you for this recipe! It has come out perfect almost every time.
Kara Blackburn
July 24, 2018 at 9:34 amHey Jenna, quick question: if I feed my starter daily in the afternoons, do I need to feed it the day that I take the 2 tbs out to make the leaven the night before I bake?
What 5 New Sourdough Bread Bakers Would Tell You | Go Eat Your Bread With Joy
March 5, 2019 at 6:26 am[…] good friend of mine wrote a blog post with super simple steps and most importantly… Amazon links to all the tools I needed. There’s […]
Sandra
December 19, 2019 at 8:51 amJenna, I have loved this method forever, but I’ve never tried doubling it. Can I just double everything to make two loaves and then separate it into two bowls for the bulk fermentation after adding the salty water? Or do I need to separate the leaven into two bowls, and just keep it separate from the beginning?
Kristen
March 25, 2020 at 11:13 amShould the starter be rising and falling right away? I started feeding mine two days ago, but it hasn’t really done much yet. Debating if I should start over or not. Its starting to smell like sourdough though!
Victoria Miller
May 13, 2020 at 4:32 pmHello! I’m so excited to be making bread for my first time! I don’t have a dutch oven though and was wondering if you had any recommendations & instructions for any other pans? I have a large round cast iron pan. Thank you!
Shalee Shuayto
June 12, 2020 at 7:59 pmAfter a couple of tries I made a yummy loaf. Excellent taste. I do need to get a smaller Dutch oven. I have a 9qt. I also think I added way to much flour on the final rise. It came out totally coated. I good the very heavily floured line to the max. Ha!
kat
July 23, 2020 at 7:42 amI’ve had great success with this recipe. I do some slight adjustments. Instead of baking same day, I cold proof from about 230pm to 6am the next morning. I also make into a batard and bake on a baking steel. I spray the batard with water and put a turkey roasting pan on top. Other than that, I follow similar. I’ve been gifting this bread to friends and everyone is wowed – thanks for the help and easy recipe!