

For the Cream Cheese Crust (makes 2 crusts):
12 tablespoons unsalted butter, cold
2 cups all-purpose flour (measure with dip and sweep method)
1/4 teaspoon salt
1/4 teaspoon baking powder
1/2 cup cream cheese (4.5 ounces), cold
2 tablespoons ice water
1 tablespoon sherry vinegar
For the Pie:
2 1/2 pounds baking apples* (6 or 7 medium), peeled, cored, and sliced 1/8-inch thick
1 tablespoon freshly squeezed lemon juice
1/4 cup dark brown sugar, packed
1/4 cup granulated sugar
1 teaspoon teaspoons ground cinnamon
1/4 teaspoon nutmeg, preferably freshly grated
2 dashes of ground cloves
1/4 teaspoon salt
2 tablespoons unsalted butter
2 teaspoons pure vanilla extract
1 tablespoon plus 1 teaspoon cornstarch
1 egg, beaten
1 tablespoon demerara sugar (sugar in the raw), for dusting
*we used a mixture of Granny Smith and Macoun apples, though Cortland would also be delish
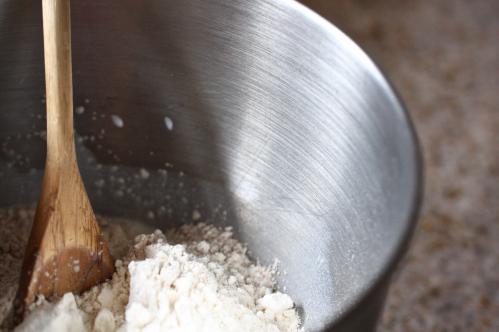
First make the cream cheese crust using a food processor.
Cut the butter into small (about 3/4-inch) cubes. Put it into a plastic baggie and freeze it until frozen solid, at least 30 minutes or longer. Then, mix the flour, salt, and baking powder into a resealable gallon-size freezer bag too and freeze for at least 30 minutes or longer.
When icy cold, place the flour mixture in a food processor with the metal blade and process for a few seconds to combine. Dont’ throw away the bag. You’ll need it again in a second.
Next, cut the cream cheese into 3 or 4 pieces and add it to the flour. Process for about 20 seconds or until the mixture resembles coarse meal. Add the frozen butter cubes and pulse for 20 seconds until the butter is halved in size. Remove the cover of the processor and add the water and vinegar. Pulse until most of the butter is reduced to the size of small peas. It will look like clumpy powdered sugar, not at all like a dough, it won’t even stick together.
Divide the crumbs in half and spoon into the reserved plastic bag and another freezer gallon-size bag. One dough for the bottom and one dough for the top of the pie.
Holding both ends of each bag opening with your fingers so that it doesn’t all spill out, knead the mixture by pressing it from the outside of the bag and kneading it with the heels of your palms until the mixture holds together in one piece and feels slightly stretchy when pulled. Shape it into a flat disc inside the bag and refrigerate for at least 45 minutes or overnight.
Remove the dough for the bottom crust from the refrigerator. If necessary, allow it to sit for about 10 minutes at room temperature or until it is soft enough to roll.
On a lightly floured surface with a lightly floured rolling pin, roll out the bottom crust until it’s an 1/8-inch thick or less and at least 12-inches in diameter. Transfer it into your 9-inch pie pan pressing it gently into the sides and bottom of the pie plate. Trim the edge almost even with the edge of the pan. Cover the whole thing with plastic wrap and refrigerate it for a minimum of 30 minutes and a maximum of 3 hours.
Meanwhile, in a large bowl, combine the lemon juice, sugars, cinnamon, nutmeg, cloves and salt. Then, as they are peeled and sliced, add the apples to the bowl (you want them thinly sliced so they get nice and packed into the pie and leave few air pockets) and toss gently to coat after each addition to prevent the apples from browning. Allow these apples to macerate in the spices and their juices at room temperature for a minimum of 30 minutes and a maximum of 3 hours.
Next, transfer the apples and their juices to a colander suspended over a bowl to capture the liquid. The apples will release at least 1/2 cup of liquid.
In a small saucepan (preferably nonstick), over medium-high heat, boil down the apple juice liquid, with the butter and vanilla extract, to about 1/3 cup or until it is thick, syrupy and lightly caramelized. Make sure you only swirl the liquid in the pan to stir it. Do not use a spoon or anything. Meanwhile, transfer the apples to a bowl and toss them with the cornstarch until it is all mixed in.
Remove the top crust from the fridge and allow to sit at room temperature until it’s easier to roll out.
Pour the warm, reduced apple syrup over the sliced apples, tossing gently.
Roll out the top crust in the same way you did the bottom crust until it is about 12-inches in diameter.
Spoon the apple mixture into the pie shell. Make sure they are really packed in there. Moisten the border of the bottom crust by brushing it lightly with water and place the top crust over it. Tuck the overhang of the top crust under the bottom crust border and press down all around the top to seal it. Crimp the border using a fork or your fingers. Then, make about 6 1-inch long slashes in the top crust to allow it to vent.
Cover the pie loosely with plastic wrap and refrigerate it for 1 hour before baking to cool and relax the pastry. This will maintain flakiness and help to keep the crust from shrinking and burning.
Preheat the oven to 425 degrees Fahrenheit for at least 20 minutes before baking. A preheated oven is extremely important when baking. Put the oven rack at the bottom rung of the oven.
Remove the cooled pie from the fridge. Brush the top of the pie lightly with the beaten egg and attach any decorative pastry leaves or cut-outs at this time. Dust the pie with the demerara sugar.
Place a sheet of aluminum foil on the bottom of the pie plate and place in the oven. The foil is to prevent juices from dripping over the edge and burning. You don’t want it to actually cover any part of the pie. It’s just there to save your oven. You can also line a baking sheet with foil and put it in the oven during preheating to accomplish the same thing.
Bake the pie for 45 to 55 minutes or until the juices bubble through the slashes and the apples feel tender but not mushy when a small sharp knife is inserted through a slash. Check the pie after 30 minutes, if the edges are browning, wrap some foil gently around the pie edges to stop the pie crust from burning but still allowing the pie to vent and cook on top. You want to make a little foil pastry ring to protect the crust edges.
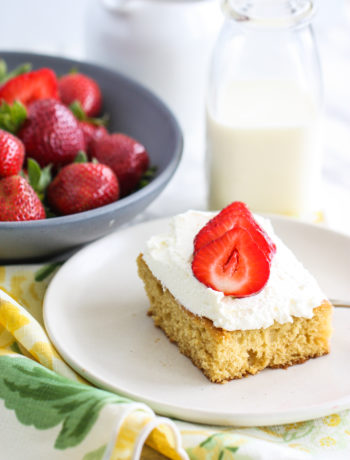
When done, cool the pie on a rack for at least 4 hours before cutting. Serve warm or at room temperature with ice cream.
photo and recipe from The Blue-Eyed Bakers
read more about The Great Thanksgiving Recipe Swap here!

Tab - Just Weighing In
November 8, 2010 at 1:20 pmOh my heavens – definitely going to make this for Thanksgiving because I don’t have any good pie recipes. 🙂
Tabitha (From Single to Married)
November 8, 2010 at 1:22 pmCream cheese IN the crust? That’s my idea of perfection right there! Looks like it takes quite a bit of time to make but I’m sure it will be worth it.
Cathy B. @ Bright Bakes
November 8, 2010 at 1:22 pmThe cream cheese crust reeled me in on this one :)…looks yummy!
love,
cathy b. @ brightbakes
Jessica @ How Sweet It Is
November 8, 2010 at 1:31 pmTheir pie looks amazing!
Jasmine @ Eat Move Write
November 8, 2010 at 1:47 pmI adore the name of this pie. I expected it to have blueberries in it, and am so inspired by the thought. The pie itself seems extraordinarily elaborate to make, but I’m definitely inspired to bake a pie. Awesome!
eml
November 8, 2010 at 2:53 pmyeah, the name is awesome.
Courtney @ Sweet Tooth, Sweet Life
November 8, 2010 at 2:12 pmThis pie sounds amazing! I’ve always been afraid to try making my own crust, but this cream cheese one sounds too interesting to pass up!
Michele @ Healthy Cultivations
November 8, 2010 at 2:15 pmThis is a really unique apple pie! Very interesting.
Hope
November 8, 2010 at 2:24 pmCream cheese in the crust?! Oh my
Natalia - a side of simple
November 8, 2010 at 2:27 pmI’ve never heard of cream cheese in pie crust. This changes my whole outlook on life 🙂
stacey-healthylife
November 8, 2010 at 3:36 pmYum, cream cheese.
Mimi (Gingersnaps)
November 8, 2010 at 3:49 pmThis pie sounds awesome! What does a cream cheese crust taste like, in comparision with a regular?
Mary @ Bites and Bliss
November 8, 2010 at 4:03 pmApple pie’s not my absolute favorite..but this one sounds incredible! thanks!
Camille
November 8, 2010 at 4:46 pmThis looks freaking amazing. I am kind of scared to make pie, it seems really intimidating!
Cara Craves...
November 8, 2010 at 5:41 pmThat is gorgeous!
The colouring on the crust is perfect.
Camille @ La Bella Vita
November 8, 2010 at 6:15 pmOh my, this looks delicious. Another contender on the quest to make the perfect apple pie.
Christine (The Raw Project)
November 8, 2010 at 8:59 pmThis looks amazing! I’m not usually a pie person, but yours looks so pretty and perfect for the Thanksgiving table.
Averie (LoveVeggiesAndYoga)
November 8, 2010 at 9:26 pmblue-eyed..I had to read to the bottom of the post to get why it’s called that. I thought b/c you have blue eyes…you called named it after your baby blues.
Cream Cheese Crust…anything with that much butter and cream cheese….just HAS to be out of this world amazing. I think I could just eat crust 🙂
Great work!
Anna
November 9, 2010 at 5:09 amI’m sorry but this recipe totally doesn’t fit in the theme of Jenna’s blog (I realize it’s a recipe swap but still..) Soooo incredibly time-consuming.
Lu
November 9, 2010 at 7:38 amThat crust sounds delicious. I love pie, but I usually just eat the filling. However, this crust would make me want to at least try it. I also thought that it was named because of your eyes.
rhedann
August 15, 2012 at 12:45 amyummy.. try it
rhedann
August 15, 2012 at 12:47 amyummy..try i..